Wondering if you can caulk over caulk to save time and effort? We’ve all been there – staring at peeling, cracked caulk and hoping for a quick fix. Unfortunately, as one expert puts it, “Recaulking over old caulk is like putting a Band-Aid® on a broken leg.”
Although new caulk might stick to old caulk, it generally won’t create a proper watertight seal. In fact, removing the old caulk and applying a fresh bead usually creates a better, longer-lasting result. If the existing caulk is cracked, peeling, or in bad shape, it’s best to remove it entirely before applying new material. Worryingly, if you have moldy caulk, just covering it won’t help. The mold will keep growing and spreading inside your walls.
However, there are certain situations where you can put new caulk over old caulk. If the existing caulk is still in relatively good condition, it might be doable – though still not ideal. To succeed in a recaulking project, you need to prepare well. The new caulk should go on a surface that is clean and dry.
This guide will show you how to caulk over old caulk. We’ll cover when it’s okay to do this and how to do it right, if you really need to. Let’s dive in!
When Can You Caulk Over Old Caulk?
The answer to whether you can caulk over old caulk isn’t a simple yes or no. Despite what some might suggest, most professionals advise against this practice as a general rule.
First and foremost, new caulk might stick to old caulk under certain conditions, but the results are rarely ideal. For this approach to work, the existing caulk must meet specific criteria:
- It must be in relatively good condition without cracks or damage
- The old caulk must be completely clean, dry, and free of oil
- There should be absolutely no signs of mold or mildew
Under these limited circumstances, you might successfully apply new caulk over existing caulk. Nevertheless, professionals caution that this method won’t produce long-lasting results.
Most importantly, there are situations where you should never attempt to caulk over old caulk:
- Damaged or worn caulk: If the existing caulk is cracked, peeling, or separating, adding new caulk is futile. The old caulk will continue to pull away, taking your new application with it.
- Moldy caulk: Caulking over mold is comparable to “putting a Band-Aid on a broken leg”. Mold doesn’t just go away. It keeps growing under the new layer. This can spread into walls and create health risks.
Consequently, if you decide to caulk over existing caulk, you must extend the new bead beyond the edges of the old caulk to create proper adhesion. This approach typically creates a larger, potentially unsightly bead.
Notably, different types of caulk require specific cleaning methods before applying a new layer. Acrylic latex caulk should be cleaned with soap and water, whereas silicone caulk requires a mixture of bleach and warm water in a 1:10 ratio.
Instead of a quick fix, it’s best to completely remove old caulk in most cases. This helps with adhesion, stops mold growth, and makes a better, longer-lasting seal. It keeps your spaces watertight.
Types of Caulk and Their Compatibility
Understanding the different types of caulk is essential when deciding if you can apply new caulk over existing material. Not all caulks are created equal, and their compatibility varies significantly.
Silicone caulk stands out as the most problematic when considering compatibility. As experts bluntly state, “nothing will stick to silicone – not even silicone”. This problem happens because silicone has oils. These oils move to the surface over time. As a result, new sealants can’t stick well. Silicone is great for waterproofing and flexibility. This makes it perfect for bathrooms, kitchens, and places with extreme temperatures.
Acrylic latex caulk, often called “painter’s caulk,” offers different properties. Unlike silicone, acrylic latex forms stronger bonds when applying a second layer. It’s paintable, easy to clean, and bonds well with most surfaces including wood, plaster, and tile. Acrylic latex caulk usually lasts 10 to 15 years. But, moisture and temperature changes can impact its durability.
For those seeking a middle ground, siliconized acrylic latex combines benefits from both types. This hybrid provides better adhesion, more flexibility, and less shrinking than standard acrylic latex. It provides waterproof sealing while remaining easier to work with than pure silicone.
When deciding which caulk to use where:
- Silicone works best for wet areas like showers, bathtubs, and sinks due to its superior moisture resistance
- Acrylic latex is preferable for dry areas such as baseboards, trim, and moldings where paintability matters
- Siliconized hybrids offer versatility for moderate moisture areas
When it comes to old and new caulk, keep this rule in mind: acrylic latex can stick to old acrylic latex if conditions are perfect. But silicone hardly ever sticks to anything. For silicone, you have two choices: remove it completely or add a wider bead. This new bead should go beyond the old caulk to stick to clean, silicone-free surfaces.
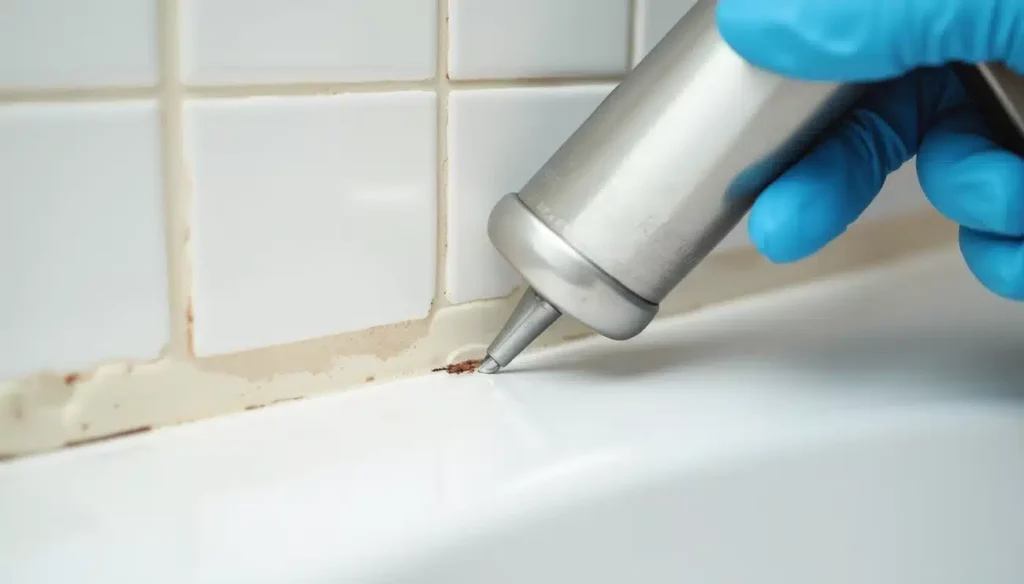
How to Caulk Over Old Caulk (If You Must)
Sometimes, you need to caulk over existing caulk. It’s not the best option, but using the right technique can lead to good results. Here’s how to approach this task correctly:
- Clean thoroughly: For acrylic latex caulk, use soap and water to clean both the old caulk and surrounding surfaces. For silicone caulk, use a 1:10 ratio of bleach and warm water, as soap residue prevents proper bonding with silicone.
- Allow complete drying: Let the cleaned area dry for approximately 24 hours. Proceeding with wet surfaces will compromise the seal and adhesion.
- Check for damage: Ensure the old caulk is still firmly adhered with no peeling, cracking, or mold. If any of these issues exist, complete removal is your only viable option.
- Apply new caulk properly: When applying fresh caulk, extend the bead beyond the edges of the old caulk. This critical step ensures the new layer bonds with surrounding surfaces rather than relying solely on adhesion to the old caulk.
- Use proper pressure: Push the caulk with steady pressure. This helps fill the whole joint width fully.
- Tool for best results: Before skin forms, smooth the new caulk bead with a wet finger or caulking tool for a professional finish.
- Allow proper curing: Most caulks require at least 24-48 hours to fully cure before exposure to moisture. Silicone caulk cures best in humid environments, while acrylic latex caulk needs dry air.
Remember that fresh caulk provides optimal results. Expired caulk will never properly cure, so check the expiration date before application. Temperature also affects curing. Keep the environment between 40-80°F during application and curing.
For kitchens and bathrooms, water damage is a big risk. So, extending the new caulk beyond the old caulk isn’t just for looks. It’s crucial for a strong waterproof seal.
Conclusion
Caulking over old caulk presents more challenges than benefits in most scenarios. This method may look like a quick fix, but it often leads to weak seals and issues later on. Proper surface preparation is key to any caulking project. This matters whether you use new caulk or deal with old material.
The type of caulk you choose also significantly impacts your results. Silicone caulk, while excellent for moisture resistance, refuses to bond with old silicone. Conversely, acrylic latex offers better compatibility with existing layers under ideal conditions. Knowing your materials before starting a caulking project saves time and cuts down on frustration.
In rare cases, you may need to caulk over old material. To get good results, follow the cleaning, drying, and application techniques we’ve shared. Still, removing old caulk is the best way to ensure a seal that lasts for years, not just months.
Ultimately, proper caulking protects your home from water damage, mold, and costly repairs. Contact The Smart Fix Handyman for help with caulking and other misc home repairs! Their expertise makes sure the job is done right the first time. Whether you need complete caulk removal or tips for doing it yourself, they’ve got you covered.
Before attempting any caulking project, honestly assess the condition of your existing sealant. If you’re unsure, take out old caulk completely. This gives you the best start for a strong, watertight seal that keeps your home safe for years.
FAQs
Q1. Is it safe to apply new caulk over existing caulk? Generally, it’s not recommended to caulk over old caulk. This method seldom creates lasting results. It can cause problems like weak adhesion, trapped moisture, and mold growth. It’s usually best to remove the old caulk completely before applying a new layer.
Q2. When is it acceptable to caulk over old caulk? You can consider caulking over old caulk only if the existing caulk is in good condition, completely clean, dry, and free from cracks, damage, or mold. However, even in these cases, it’s not ideal and may not provide a long-lasting seal.
Q3. What’s the difference between silicone and acrylic latex caulk? Silicone caulk works well against moisture and offers great flexibility. It’s perfect for use in bathrooms and kitchens. However, it’s difficult to paint over and doesn’t adhere well to old caulk. Acrylic latex caulk is easy to use, paintable, and bonds well with many surfaces. However, it is not as water-resistant as silicone.
Q4. How should I prepare the surface if I must caulk over old caulk? Clean the old caulk well before applying new caulk. Use soap and water for acrylic latex or a bleach solution for silicone. Allow the area to dry completely for about 24 hours. Ensure the old caulk is firmly adhered with no peeling, cracking, or mold before applying the new layer.
Q5. What’s the proper technique for applying new caulk over old caulk? When applying new caulk over old, extend the bead beyond the edges of the old caulk to ensure proper adhesion. Apply with positive pressure, pushing the caulk ahead of the nozzle to fill the entire joint. Smooth the bead with a wet finger or caulking tool before it forms a skin. Allow proper curing time, typically 24-48 hours, before exposing to moisture.
Need a Handyman You Can Trust?
Skip the franchise fees. Get local expertise and honest pricing.